Saturday, 29 October 2016

☺ Speed-up Internet Connection in Windows 7/vista/xp☺

When we use Windows 7/vista/xp it doesn’t give us full bandwidth speed as it has to maintain OS IDLE MODE. This idle mode is also applicable for processor, RAM, Audio & Video processing units to comfort a user but using or applying  some tricks we can do it very simply.

Today we are going to know how to modify the idle or limit mode of bandwidth without doing any harm to Windows OS.
It’s a normal trick by using Group Policy Editor or gpedit. Just follow the steps…..

  1. Go to Start>run to run a command.
  2. In run type gpedit.msc and hit enter or click ok. The Group Policy Editor window will open if you have the sufficient privilege on the computer.


Start>run>gpedit.msc
     3.  In Group Policy Editor window select Computer Configuration in the left side and expand theAdministrative Template array sign.
     4.Under the Administrative Template expand Network and select QoS Packet Scheduler.
     5. After selecting QoS Packet Scheduler some settings will be shown in the right side and select Limit reservable bandwidth.
 Administrative Template>Network>QoS Packet Scheduler
     6. To modify this setting double click on Limit reservable bandwidth and get the properties of that.
     7. By default it is not configured (not configured or default value is 20%). So Enable it from option and decrease the value to 0%.
Enable Limit reservable bandwidth to 0%
     8. Then apply this setting and complete it clicking ok. You have to restart your internet connection.
That’s all. Enjoy a full speed internet connection which is provided by your ISP.

☺ How to Shut Down Windows 8 Completely☺

Shutting down a desktop, laptop, notebook or tablet running Windows OS means to log off and turn off the computer system where no processes or services will be running. There shouldn’t be any power that can be used with any hardware after a complete shutdown.
In windows 7/Vista/XP shutting down meant and did above things. If you are using Windows 8, which is in beta version now, you may realize that after shutting down Windows 8 some of the components getting power/electricity. As a result the LED on the mouse or keyboard is on. After some time  or long time when you come back to your PC just pressing any key of the keyboard or mouse it starts Windows 8. The Sleep mode does the same thing.

Yes, you can hover the mouse pointer to the right-top or left-down sight anytime and get the charm bar, Settings to Shut Down, Sleep or Restart in Power option.


Win8 shutdown
Shut down Windows 8

There is some advantage of this shutdown behavior. And if you need a quick start up then shut down Windows 8 by its default way. But the terms “Shut down” and “Sleep mode” has the different actions and behavior in the Windows XP, Vista or 7.

So if you think that you need to shutdown Windows 8 PC completely like Windows7/Vista/Xp then read the rest part of this post.
Create a shortcut to Shutdown Windows 8:
1. First you need to create a shortcut by clicking right-mouse in an empty place on the Desktop. Now navigate New and Shortcut.

create shortcut
Creating New Shortcut

2. There you will be asked for typing the location of the item. So, type or paste the code shutdown.exe -s -t 00 and hit Next.

set code for shutdown
Placing the Shutdown Code

3. Provide a name for this shortcut and Finish it.

give a name to shortcut
Shortcut Name

You can pin it to the Taskbar or Start menu. To do so, click (right-mouse) on the shortcut and the options are shown.

Pin shutdown shortcut to Taskbar or Start
Pin to Taskbar or Start

You can also change the icon of this shortcut by going its properties and Change icon.
Now when you need to shutdown the Win8 OS just double click on this shortcut.
Shutdown Windows from Command Line:
If you like to use the command then you can go to run, type cmd and hit enter. Then type shutdown.exe -s -t 00 in the command prompt and press enter. Within a second your Windows machine will shut down completely.

Shutdown Command Line
Command to Shutdown Windows OS

Third-Party Shutdown Software:
There is a freeware software called Shutdown Windows which will shutdown your PC with a confirmation and voice alert. To download it go here and select a download mirror.


Shutdown Windows Software
Shutdown Windows

That’s it! As Windows 8 is not released the stable version, many things may be changed. This OS is designed not only for the Desktop PC but also for the Tablet, Notebook etc. So its design is bit different to keep all the features and options same in all devices.

♣How to Change folder background in Windows 7/vista/xp[without software]♣

We like to customize folder and drive’s icon, color, view to give it a unique look. What about changing folder background? Usually we use software to do that. But here we’ll change the folder’s background without any software. To do so firstly we should know, what is the “desktop.ini” and how it works?


set background image
Folder Background
Desktop.ini is the file where system assigns the values of icon, info, background image source etc. The folder will gives info about itself or a thumbnail view which has the proper desktop.ini file. It is a hidden system file and it’s possible to show by CASE: 2 step: 2 in this article. Nothing to worry about it because the system can automatically create a new one if the file is being damaged or absent. It just needs a reboot of the system.
Don’t like to read? Watch this video to change folder background.

Didn’t get a clear idea? Read the tutorial.
The following tutorial will show how to set an image as the background in a folder. This tutorial is divided into two CASEs according two different conditions.
 
CASE 1: Creating a desktop.ini file:
 
1. Go to the folder which background image will be changed. 2. Create a new text file and open to edit it.
3. Copy following two lines and paste them to the text file.
[AveFolder]
IconArea_Image=”C:\Users\user_name\my pictures\image.jpg”
4. If you want a shadow effect for text give ShadowedText=1 and for applying same image to all sub directories give Recursive=1 like this.
[AveFolder]
IconArea_Image=”C:\Users\user_name\my pictures\image.jpg”
ShadowedText=1
Recursive=1
Untitled
ShadowText & Recursive
5. After creating, save the text file then rename it to desktop.ini and restart your PC.
The “IconArea_Image=” (CASE: 1 step 3) describes the source path of the background-Image. You should not select an image source path from removal disk. If you are setting up the image of your removal drive then your background-image source should describe a path of that drive. Sometimes a message could come showing replacement of desktop.ini file. That means your working folder already has same file. It is better to cancel the replacement of this file and follow the CASE: 2.
CASE 2: Editing desktop.ini: 1. Go to Folder Option from Control panel or from explorer’s menu bar>folder option.
Folder Option Windows
Folder Option from Control Panel
Folder option (2) Windows
Folder option from Explorer menu bar
2. Select view tab and scroll down to find out hide protected operating system file and uncheck it. It is important to mark Show hidden files, folders and drives first from this view tab.
un hide protected file of OS
Folder Option>View tab
3. Find out the desktop.ini in the current directory and open it with a text editor, like: notepad.
Hidden files folders on Windows
Hidden desktop.ini
4. Paste the lines described in CASE: 1 step: 3, just after the [.ShellClassInfo]’s description lines.
shell class info and ave folder
[.ShellClassInfo] & [AveFolder]
5. Save and exit from desktop.ini
6. Restart your PC to take an effect on OS.
Important: The background image won’t change properly until restart your computer.

☻How to add image or picture to mp3 files☻

Adding a new image or changing the existing mp3 album image is really a fun! But many of our friends don’t know how doing that simple task. So here you will know how to add an image to mp3 files and show that image when you play the mp3 song by any media player.

This image which is embedded with mp3 file is known as the album art, cover image or tagged image. When the mp3 will be played select the Album Art visualization mode if the image is not displayed.

Let me introduce the Mp3Tag which is compatible with Windows 7/Vista/xp. It’s a freeware software and you can download Mp3Tag from their official website.

Adding an image or picture to mp3 files:
The Mp3Tag contains a lot of features with it and lets you allow to add, remove or customize the album art image. You can edit or assign any details for your mp3 files. It also allows you to select all the mp3 files in a directory and perform its given task to all. It is the full compact utility for your mp3 songs.


Steps to embed an image to mp3:


  1. Download Mp3Tag, install and run it.
  2. Select the directory where the mp3 files are located.
  3. After loading all mp3 files of the selected directory, you can choose one or all files to be changed.
  4. If the selected mp3 file contains an album art then it will be shown bottom left.
  5. To add an image first click on extended tags and a Tags window will come.
  6. From the Tags window you can change any details from Metadata located on the left.
  7. The cover section, located on the right side, will allow you to add a cover image.
  8. To add or change the cover image, hit the Add cover and browse your desired image file.
  9. Select your image file and press OK.
Wow! You’ve changed the mp3 Album Art. Play your song in PC or mobile, your embedded image will be displayed. It’s a cool trick, Isn’t it?

Important: Your image file must be in JPG, JPEG or PNG format. Installing the software might need the administrator privilege.
http://techstrick.blogspot.in/p/how-to.html

☺Take Ownership & Grant Full Control Permission in Windows 7/Vista☺

Folder access denied
Windows 7 and Vista’s file permissions is managed by the Trusted Installer and it is the owner of all Windows system files. So, Windows 7/Vista doesn’t allow any user even the Administrator to modify (rename, delete, move) those system files. Sometime for tweaking, you might need to rename, replace or move the system file in Windows operating systems. But it needs to take ownership of a file and grant full control permission before modifying it. Otherwise, a pop-up message will show you Access is denied in Windows.

Here, you’ll know the easiest way to take ownership and how to grant full control permission on a folder or file using the command prompt.
Take ownership of a file/folder:
Go to start menu > All programs > Accessories > Command Prompt and run it as an administrator. In command prompt type:
takeown /f “path”
Take ownership using command prompt
Type the location/directory of the file or folder instead of path. Example: C:\windows\system32
If you need to take ownership often, then use the registry hack file from here. Extract it. Double-click on InstallTakeOwnerShip.reg and an option willbe added in your context menu.
Grant Full Control Permissions:
After taking ownership, in the command prompt type:
icacls “path” /grant user:f
Grant full control permissions
Replace the path with the file or folder location name (Ex: C:\windows\system32) and replace the user with you user account name (Ex: Administrator). Here, take ownership of windows system32 folder make me the owner of system32 folder and grant full control permissions will let me modify the folder that had only Windows access.

☻3 Ways to Enable Administrator Account in Windows 7☻

The administrator account is a hidden, disabled and built-in account with Windows 7/Vista/xp. But a user can enable this account for some special actions. Such as troubleshooting, installing harmful software or some special networking tasks. By default, most of the user accounts are a part/member of theAdministrator account. Others are standard accounts without being any part of an administrator account.

Windows disabled this account to prevent malicious programs and harmful activities on the system. So any special task of system needs administrative privilege and the annoying UAC (User Account Control) bar will pop up for the users, except the administrator account.This post will show you how to enable Administrator account in three easy ways. Choose only one method from below to activate administrator account.

Method#1. Using command prompt: Search cmd.exe in start menu and run cmd.exe as administrator.

Start menu > cmd.exe
To enable Administrator account Type: net user administrator /active:yes
To enable administrator account
Hit enter and the command should execute successfully.
Command line to disable this account: net user administrator /active:no
To disable administrator account

Method#2. From Local Users and Groups

Go to control panel navigate to Administrative tools and computer management.
Control Panel > Administrative Tools > Computer management
Expand the Local users and Groups arrow and select Users. Then, From the right pane, double-click on theAdministrator.
Local users and Groups > Users & Administrator
Un-check the “Account is disable” and it should be look like below.
Administrator account properties
OK it and your settings will be saved.
From here you can also disable the Administrator or other account.

Method#3. From Local Security Policy

Type secpol.msc in start menu and run it as administrator.
start menu > secpol.msc
From this Local Security Policies, expand the security options under the Local Policies.
Find “Account: Administrator account status” from the right pane.
Local Security Policies
Open the “Account: Administrator account status” and choose Enabled to enable it.
Administrator account status
You can also disable it from here.

After completing any of above processes, reboot your PC or log off. Now you will see a new account “Administrator” which has no password by default. Log in to this account and enjoy the real administrator power of your PC.

♣ Easily Lock a Folder in Windows 7/Vista/XP ♣

The Windows operating system (7/Vista/XP) allows you to lock folders but using third party software. A folder locker software mainly protects folders by your given password. Security is always a major fact if you have some personal or important files and want to make them hidden from others. Many file/folder locker software are available to download but here you will get a powerful software which will protect your folders more strongly with its advance features.


So lets know about a powerful folder locker software Folder Protector, provided by kakasoft.

Folder Protector
Most Important Features:
  1. Folder Protector lock any folder in 1 second or less.
  2. The password protected folder/content is undetectable.
  3. It can protect removal (USB, memory card, external HDD) folder.
  4. Windows search is unable to find out the protected folder/content.
  5. You can unlock the folder/content in three ways: Virtually, Temporally or completely.
  6. It’s a handy tool, easy to use and manage.


How to lock a folder:


First you need to download the Folder Protector. (Seems kakasoft.com is unable to give the download).
Just keep the Folder Protector to the targeted folder, whose contents will be locked.
Place the software to target location
Give your password two times and OK.
It’s done!
When unlocking type the password key and “Unprotect”. Here you can also choose a method of unlocking the folder.
Unlock the folder
You can also select Protect Another to lock another directory.
Protect another folder
That’s it. Now you can easily password protect or un-protect a folder. And your privacy is full-filled!

♥Disable Google Chrome Update in Windows 7/Vista/xp☺

Google Chrome (Image Source)
By the google updater background process all google applications as well as google chrome can update itself. It’s not so easy and reliable to disable updates of google without the official method. Google’s help site provides google update for enterprise to manage the updates policy. Though staying with the latest update is always a better choice. Sometimes it’s become very hard to stop the updates by other ways and unable to get full internet speed as well as loosing the bandwidth.

This post will show you how to disable google chrome updates. Google provides a .adm file, also known asgroup policy template and administrative template for Windows operating system. By this trick you can also stop any google applications update.

How to Disable Google Chrome Updates:

1. Download the Administrative Template for Windows OS from here. Then you need to go Windows Group Policy editor. Go to start menu > run and type gpedit.msc and hit enter.
run gpedit.msc
Run gpedit.msc
2. Select the Administrative Template and click right mouse key. Select add/remove templates and add the downloaded template. Then close it.
add google adm file
Add the downloaded .adm file
The template added
3. The new template Classic Administrative Templates (ADM) will be added under Administrative Templates.
classic administrative template
4. Now go to Classic Adminitrative Templtes (ADM) > Google > Google Update > Applications and you are at the right place where you should be, select the Google Chrome. Open it and go to its “Update policy override” properties.
Google Chrome Update Policy Override
5. By default it is Not Configured. Now enable it to set how this application will be updated or not. Thus you can stop (or manage) not only the google chrome updates service but other applications/products of google too.

☺Make Windows XP Universal Ghost With Preinstalled Soft For Every PC☺

Lots of IT Engineer spent lots of time to install Windows XP, Drivers and Software installation on a computer but now it is easy to install one go procedure, it is not a dream to be fact it.  Ha Ha Ha….
Yes Yes Yes… It is very easy to install in 15 to 20 minutes with Windows XP, Drivers and Softwares while you take a hot coffee.
I am showing how to do this with all softwares which will be preinstalled on Windows Xp system. In short description, First things you install fresh Windows XP, Second things you install Drivers, and finally third things you install all required software for Desktop PC like Microsoft Office, VLC Player, Adobe Reader, Photoshop, CorelDraw,  Nero, Antivirus, Fire Fox, Google Chrome, Picasa, Dreamweaver, Flash Player, Silverlight, etc everything you want.
Now magic is starting with following tools
  1. Windows XP installation CD for fresh installation.
  2. You will need Spat 6.0.9 final version tool for Sysprep installation.
  3. http://sourceforge.net/projects/new-spat/
  4. Ghost with bootable usb or DLC.Boot.2013.iso
  5. https://docs.google.com/uc?id=0B3WbSfUp5BjjeVExMDFBclJwQ1U&export=download

Step 1 –

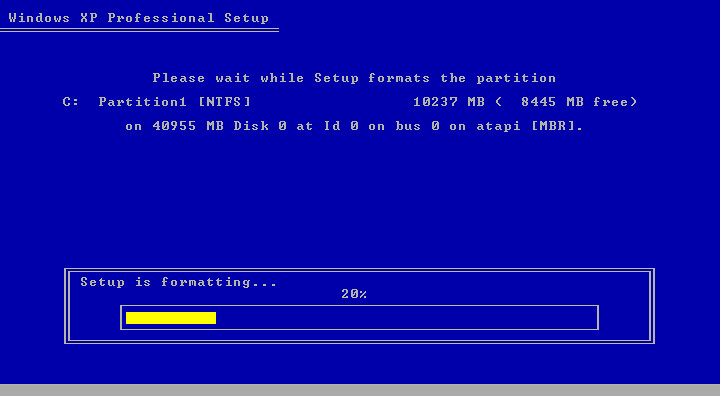
You install Fresh Windows XP in your system with Windows XP bootable CD.


Step 2 –
Install drivers in Windows XP system.
Step 3 –
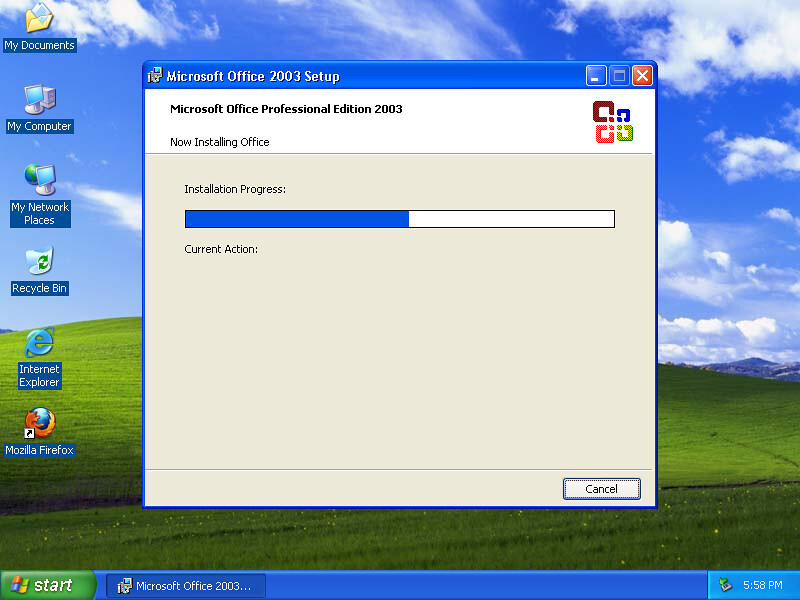
Install all software which required for your Desktop PC & change Desktop background, If require to reboot, do it.


Step 4 –
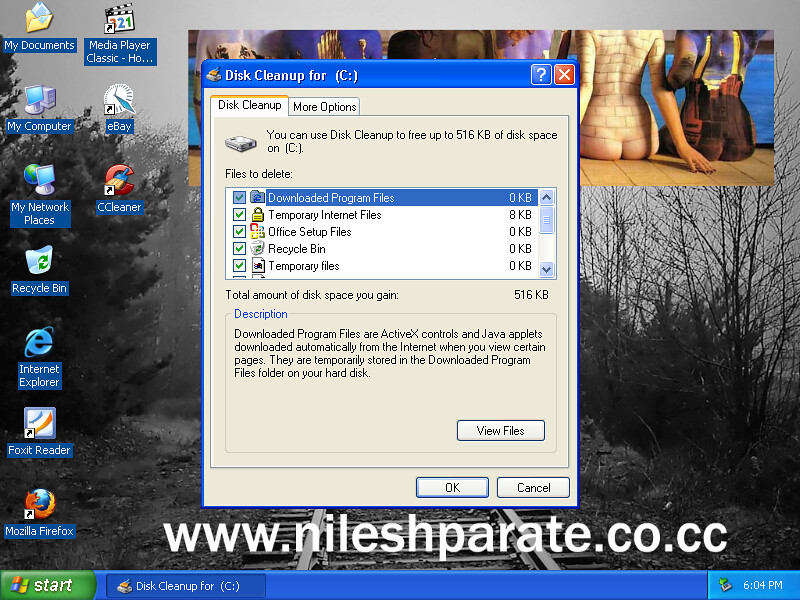
Cleanup temp files with Disk Cleanup.
Go to Start button –> Programs –> Accessories –> System Tool –> Disk Cleanup –> Select C Drive –> Select All -> Ok -> Reboot system.

Step 5 –
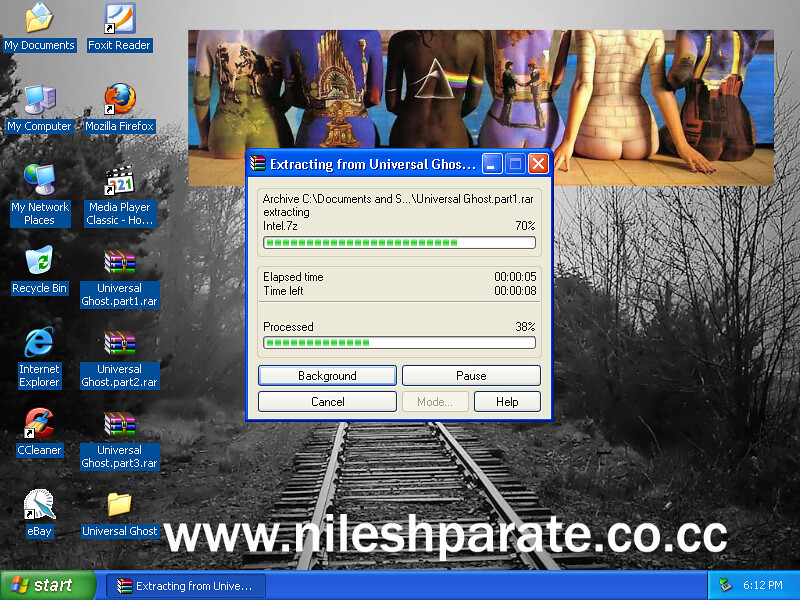
Unrar Universal Ghost file on Desktop which you have downloaded above links.

Go to My Computer -> C Drive -> Create New Folder -> Give Name “Sysprep”

Copy all files and folders from Desktop “SkyDriverXP-V11.1-Plus” and “spat6.0.9.final” folders to paste in Sysprep folder.

Delete Universal Ghost folder and rar file from Desktop. Clean up your pc with Disk Cleanup Utility as above.
Step 6 
Run “SPAT6.0.9.Gostep.info.Exe” from C:\Sysprep folder. It will prompt message, click to Ok.

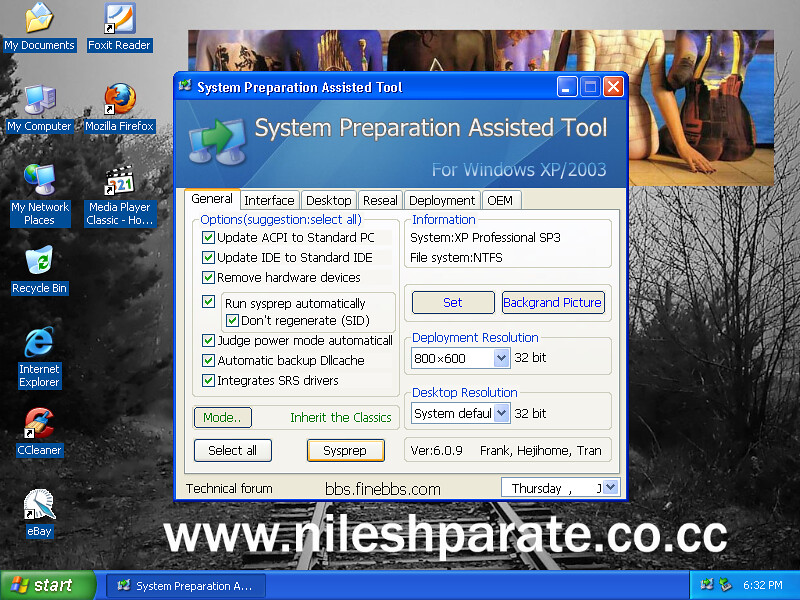
In “System Preparation Assisted Tool”, General tab -> Select all, Please check all options are selected or not.

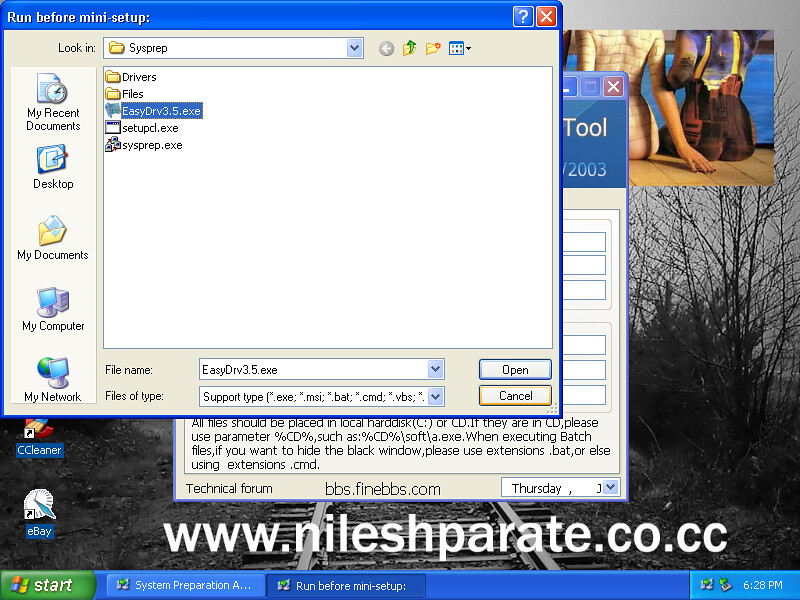
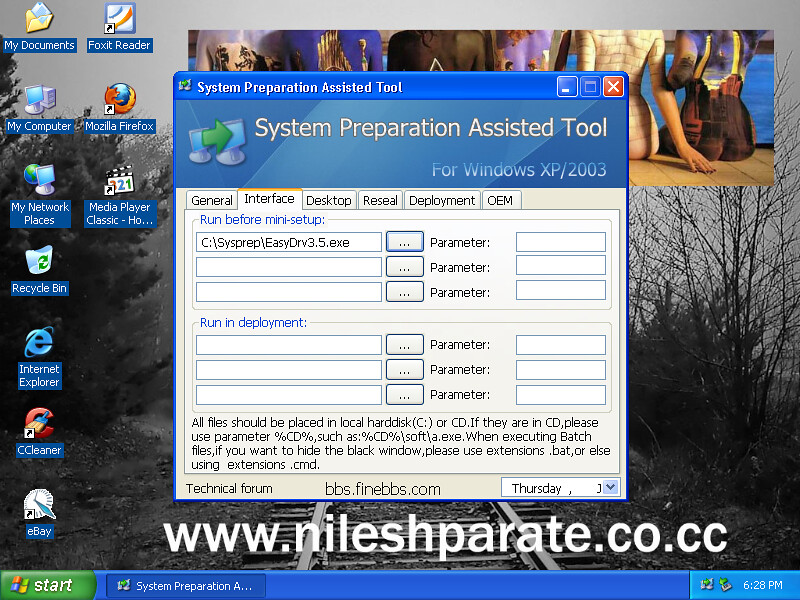
Then go to “Interface” tab select “EasyDrv3.5.exe” from C:\Sysprep folder as below image.


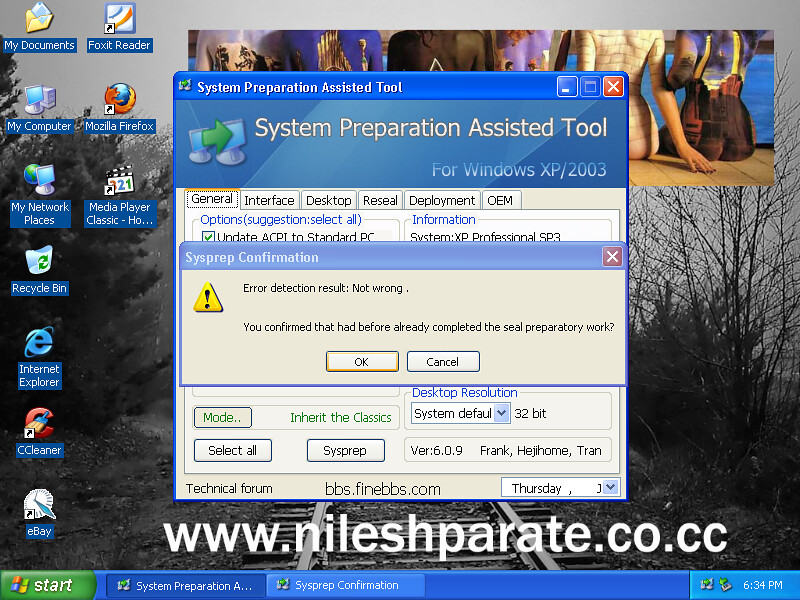
Then go to “General” tab and click on Sysprep button as below image

Now you will get Sysprep Confirmation Message, Click Ok.

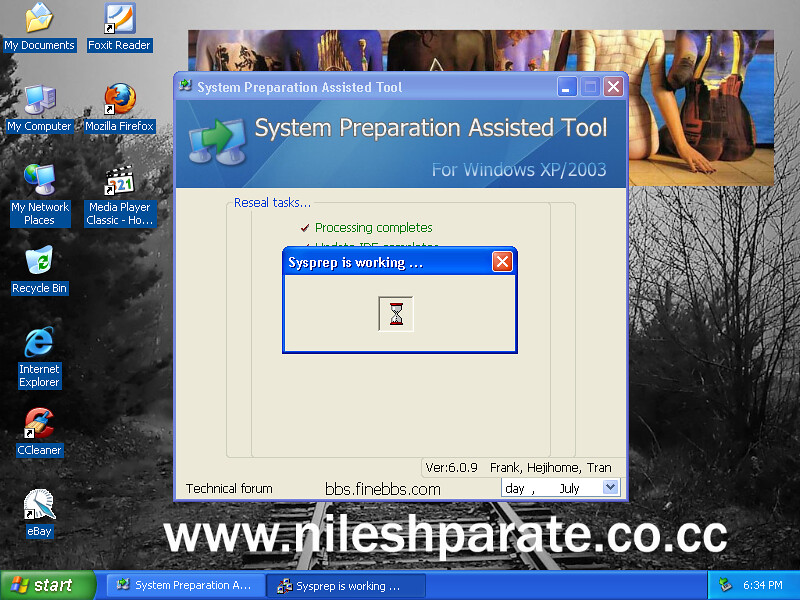
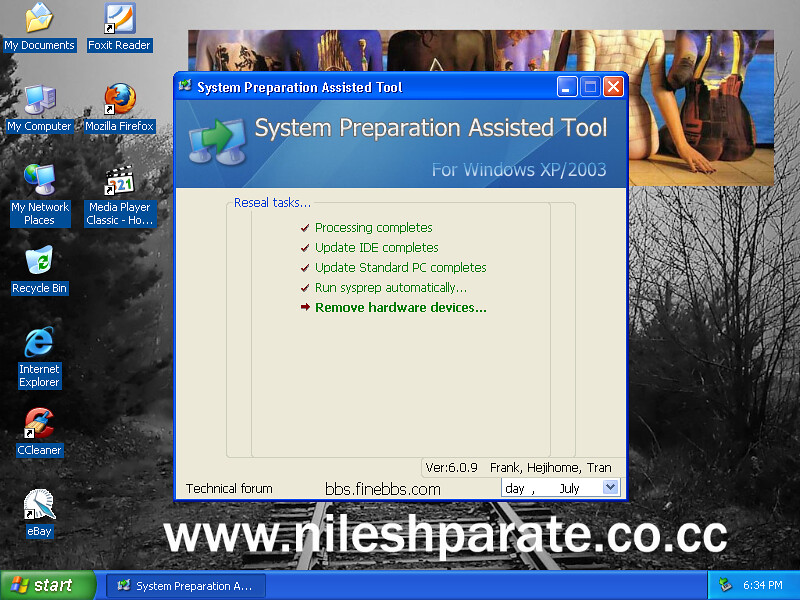
And Syspre Tool is configuring all setup.


Step 7 
Now Shutdown your PC and create a ghost image with Norton Ghost.
Finally you got a Universal Windows XP Ghost image.  You will restore it to any Desktop PC or Laptop with Ghost and then reboot PC or Laptop, it will take 15 to 20 minutes to install Windows XP with Drives and all Software which you have installed previously.  You can also follow this video to you get idea how to implement on your system from ghost image.